

Option A
Tile Over Tile
The faster, less disruptive overlay method.
Best for: Homeowners with sound, level existing tile who want to minimize labor time and demolition mess.
Option B
Full Demo
The thorough, start-from-scratch approach.
Best for: Renovations where the existing floor is damaged, uneven, or adding height would cause functional problems.
What Each Method Actually Involves
When a tiled floor looks worn, discolored, or dated, homeowners face a fork in the road: lay new tile directly over the existing surface, or rip everything out and start fresh. Both approaches can produce excellent results - but they solve very different problems.
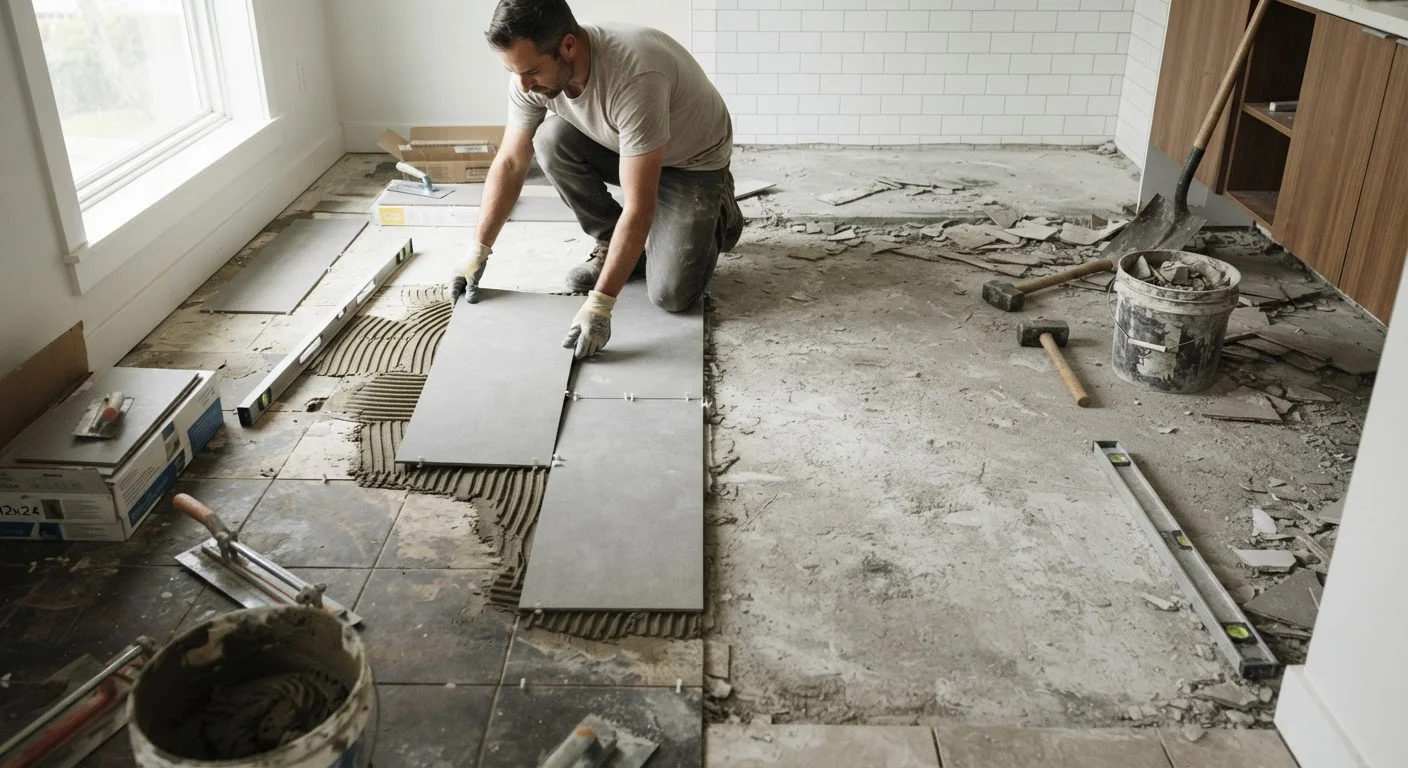
Tile over tile (sometimes called an overlay installation) means cleaning, patching, and priming the existing tile surface, then bonding new tile on top using a suitable thinset mortar. The old tile remains intact beneath. This method saves considerable time because there's no demolition, no debris hauling, and no waiting for a subfloor to be repaired.
Full demolition means removing the existing tile layer entirely - using chisels, floor scrapers, or rotary hammers - down to the structural subfloor (typically concrete slab or cement board over plywood). Once the subfloor is clean and any damage repaired, installation proceeds from scratch. This is more labor-intensive and generates significant debris, but it gives you a full picture of what you're working with.
For a broader look at when to take on demolition-heavy work yourself versus calling a professional, see our guide to DIY vs. hiring a pro.
| Criterion | Tile Over Tile | Full Demo |
|---|---|---|
| Labor time | Shorter - no demo phase | Longer - includes full removal |
| Upfront cost | Generally lower | Higher due to demo and disposal |
| Floor height added | ~¾" to 1" increase | No net height increase |
| Subfloor visibility | Subfloor not inspectable | Full subfloor access and repair |
| Longevity risk | Higher if substrate is imperfect | Lower when subfloor is sound |
| Demolition debris | Minimal | Significant - requires disposal |
| Best substrate | Fully bonded, flat, dry tile | Any condition - starts fresh |
| Code compliance | Layer limits may apply locally | Standard installation baseline |
The Critical Factors That Drive the Decision
No single rule applies universally. The right approach depends on several concrete conditions you can assess before committing to either path.
Condition of the Existing Tile
Walk the floor and tap each tile with a hard object - a coin or the handle of a screwdriver works well. A hollow sound indicates the tile has debonded from the substrate beneath. Overlaying hollow or cracked tiles transfers that instability to the new layer, and the new installation will likely crack or lift within a few years. If more than roughly 10-15% of tiles sound hollow, full demo is the more reliable choice.
Floor Height Impact
Adding a new tile layer - including thinset - typically raises the finished floor by roughly ¾ inch to 1 inch, depending on tile thickness. This matters more than most homeowners anticipate. Interior door bottoms may bind on the new surface. Transitions to adjoining rooms (carpet, hardwood, or another tile field) will require new threshold pieces. Toe-kick clearances on kitchen cabinets can become tight. Measure carefully before deciding.
Check Door Clearances Before You Commit
Before choosing the overlay method, measure the gap between your current finished floor and the bottom of each door in the room. Most interior doors need at least ½ inch of clearance to swing freely. If your existing gap is already minimal, gaining another ¾ to 1 inch from an overlay installation will likely require trimming or rehinging doors - an added cost and labor step that can erode the savings of skipping demo.
Subfloor Flatness
Most tile manufacturers and the Tile Council of North America specify that a subfloor must be flat within 3/16 inch over a 10-foot span (or 1/8 inch over 24 inches) for standard installations. If the existing tile is already uneven, adding another layer amplifies that problem. Full demo allows you to address low spots or humps directly on the subfloor with self-leveling compound.
Moisture and Structural Concerns
Any sign of moisture intrusion - staining, efflorescence (white mineral deposits), or soft spots - is a signal to pull up the existing tile and investigate. Water damage hidden beneath an overlay will continue to deteriorate the subfloor and can eventually compromise the room's structural integrity. This is especially common in bathrooms and laundry rooms.
Cost and Time: A Realistic Comparison
Tile over tile has an obvious upfront cost advantage: you eliminate demolition labor, debris disposal fees, and in most cases the need for subfloor repair. In a typical bathroom, demo alone can add several hours of labor and a dumpster or hauling cost on top of that.
Full demo, however, often prevents more expensive problems downstream. If an overlay installation fails - tiles cracking, grout joints opening, adhesion letting go - you'll end up doing the demo anyway, plus paying for a second installation. When the substrate condition is uncertain, the cost savings of overlay can be largely illusory.
It's also worth noting that permits are not always required for a simple tile replacement, but they may be required when work involves structural elements, plumbing rough-ins, or certain combinations of trades. Requirements vary by municipality, so check with your local building department before beginning any floor renovation. For projects that intersect with broader renovation planning, our article on renovating for value vs. comfort can help you think through priorities.
~¾"-1"
Typical floor height gain from overlay
Standard ceramic or porcelain tile plus thinset bed adds roughly ¾ to 1 inch to the finished floor elevation.
3/16"
Maximum allowable variation over 10 feet
The Tile Council of North America specifies floors must be flat within 3/16 inch over a 10-foot span for standard tile installations.
10-15%
Hollow tile threshold for demo consideration
Industry guidance generally suggests full demo when a significant percentage of existing tiles sound hollow or have debonded.
If this work is part of a bathroom overhaul, see our practical guide on tackling a bathroom remodel on a modest budget for sequencing and cost-management strategies.
Making the Right Call for Your Project
Tile over tile is a legitimate and durable technique - when conditions support it. The checklist is straightforward: all existing tiles are fully bonded (no hollow spots), the surface is flat within manufacturer tolerances, there is no moisture damage, the added height won't create functional problems, and local code permits the additional layer.
Full demo is the more conservative and often more durable choice when any of those conditions cannot be confirmed, or when you simply want the certainty of knowing exactly what you're building on. It is also the appropriate path whenever you suspect water infiltration, significant substrate deterioration, or when the project involves structural work in the same area - such as an open-concept floor plan change that may affect adjacent walls and transitions.
Whichever method you choose, proper surface preparation - cleaning, priming, and using the correct thinset for the tile type - is the single biggest predictor of how long the installation lasts. Cutting corners on prep is far more likely to cause failure than the choice of method itself.
This article is intended for general informational purposes. Building codes, structural requirements, and best practices vary by location and project scope. Always consult a qualified flooring professional or licensed contractor before beginning significant floor renovation work, and verify permit requirements with your local building department.
The content on this site is for informational purposes only and is not a substitute for professional advice. Always consult a qualified professional for guidance specific to your situation.