

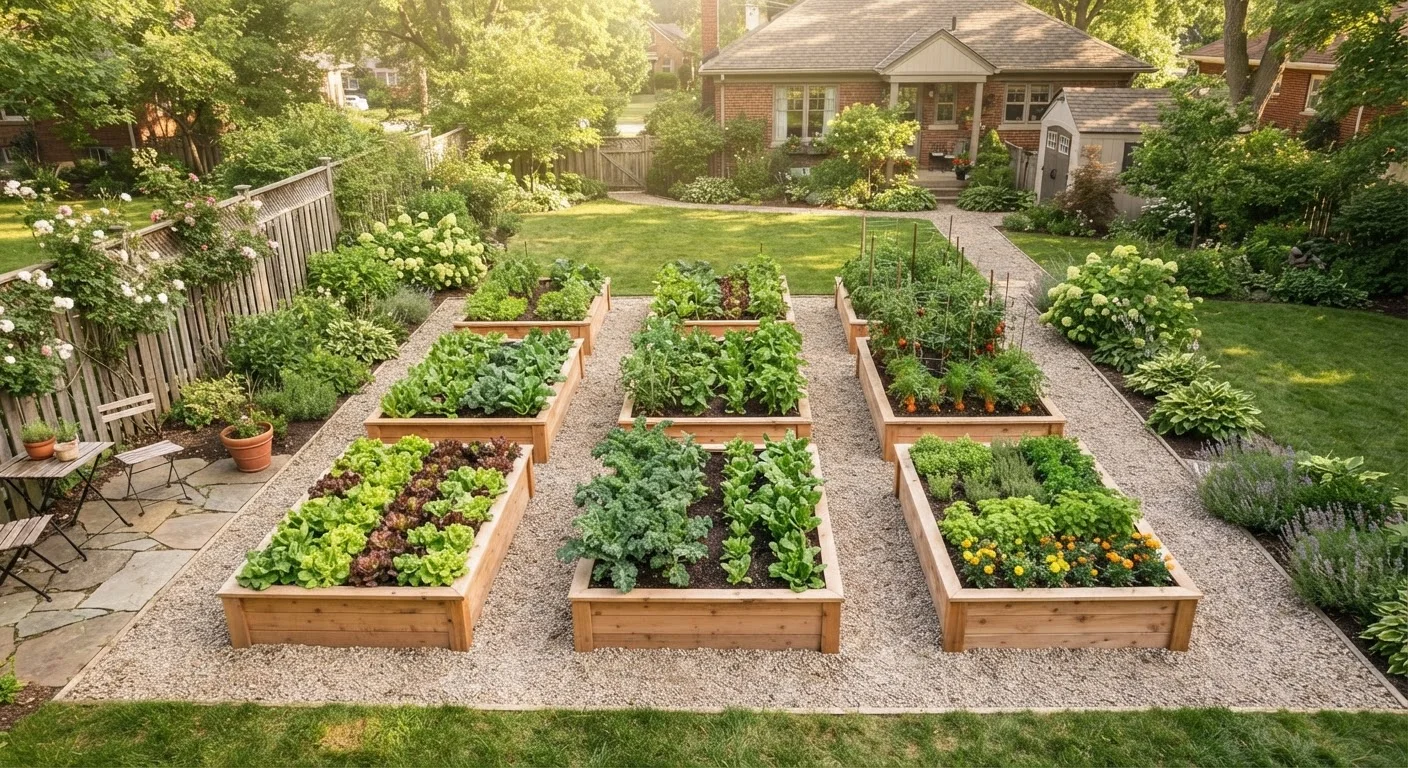
Why Raised Beds Work So Well
Raised bed gardening has gained popularity not as a trend but because it solves real problems that in-ground gardeners routinely face. Poor native soil, compaction from foot traffic, sluggish drainage, and persistent weeds are all dramatically reduced when you plant in a contained, purpose-built bed.
Because the soil sits above grade, it drains more freely after rain and warms faster in early spring - sometimes weeks ahead of ground-level plots. That head start matters for cool-season crops like lettuce and spinach, and it lets you push warm-season plants like tomatoes and peppers into the ground sooner. You also control everything that goes into the bed, so you're not fighting the clay or sand that may dominate your yard's native soil.
For gardeners with mobility concerns, raising the growing surface even 12-24 inches can make tending plants far more comfortable. And because you never walk inside the bed, soil stays loose and uncompacted, which means roots spread more easily and water penetrates evenly.
6-8 hrs
Daily sunlight most vegetables need
University cooperative extension programs consistently cite this as the minimum for productive food gardens.
4 ft
Maximum recommended bed width
This allows an average adult to reach the center from either side without stepping into the bed and compacting soil.
2-3 weeks
Typical head start vs. in-ground planting
Raised beds can warm to plantable temperatures earlier in spring due to improved drainage and above-grade exposure.
Choosing the Right Location
Placement is the decision that will most determine your bed's long-term productivity. Most vegetables - and many herbs and flowers - need a minimum of six hours of direct sunlight per day, and eight is better. Walk your yard at different times of day before committing to a spot, noting where shade falls from trees, fences, and the house itself.
Proximity to a water source matters more than most first-time builders expect. Raised beds dry out faster than in-ground plots because they drain efficiently and are exposed on all sides. A location within reach of a hose or drip irrigation line prevents the chore of hauling water across the yard every day in summer.
Also consider access and visibility. A bed you can see from a kitchen window is one you'll monitor closely. Beds placed at the far edge of the property often get neglected. Keep pathways around the bed wide enough - at least 18 to 24 inches - to move comfortably with a wheelbarrow or kneeling pad.
Orient Beds for Maximum Sun Exposure
In most of the Northern Hemisphere, positioning your bed with its long axis running north to south allows plants to receive more even light exposure throughout the day. Taller plants placed at the north end of the bed won't shade shorter neighbors as the sun tracks across the sky.
Picking Your Materials
The frame is the structural element that will last longest, so material choice deserves careful thought. Common options include wood, galvanized metal, concrete block, and composite lumber, each with different trade-offs in cost, longevity, and appearance.
Cedar and redwood are naturally rot-resistant and are among the most widely recommended wood choices. Untreated pine is a lower-cost alternative, though it typically lasts fewer seasons before degrading. Avoid older railroad ties or salvaged lumber that may carry contaminants - particularly if you're growing food. Modern pressure-treated lumber uses different preservative chemistry than older products, but many gardeners still prefer to avoid it for edible crops out of caution; consult current extension guidance for your region if you're weighing this option.
Galvanized steel kits have grown in popularity due to their durability and clean look. They can heat up significantly in direct sun, which may affect soil temperature in very hot climates.
Concrete block is inexpensive and extremely durable. Individual blocks can even serve as mini planting pockets for herbs. The trade-off is weight - once set, these beds don't move.
Whatever material you choose, make sure corners are secured against outward pressure from the soil load. A bed that bows out after one season wastes material and undercuts the structure.
Getting the Dimensions Right
Width is the most critical dimension to get right. A bed you can't reach across without stepping inside quickly develops compaction in the center - defeating one of the key advantages. Keep beds at or under 4 feet wide if you'll access them from both sides, or 2 to 3 feet wide if one side is against a wall or fence.
Length is flexible. Standard lengths of 4, 8, or 12 feet work well with common lumber dimensions and minimize waste. Longer beds may need a mid-span support to prevent bowing.
Depth depends on what you're growing:
- 6-8 inches: Sufficient for most herbs, lettuce, and shallow-rooted annuals.
- 10-12 inches: Appropriate for tomatoes, peppers, beans, and most vegetables.
- 12-18 inches: Recommended for carrots, parsnips, potatoes, and other root crops.
If your native soil beneath the bed is workable, roots can extend downward even if the bed itself is shallow. But when building over compacted ground, hardscape, or poor soil, deeper beds give plants the growing room they need without depending on what's below.
When sizing a new bed, build a 4×8-foot frame first. It's manageable to fill, fits standard lumber lengths with minimal cutting, and gives you enough space to practice crop rotation across two growing seasons.
First-time builders often underestimate how much soil volume a bed requires; a standard 4×8 frame at 10-inch depth holds roughly 26 cubic feet of mix - a meaningful investment that a well-sized first bed helps you calibrate.
Before adding soil, lay cardboard directly on the ground inside the bed frame. It suppresses existing grass and weeds for the first season, then breaks down and improves the soil beneath.
This technique - sometimes called sheet mulching - eliminates the need to remove existing vegetation entirely and adds organic matter as the cardboard decomposes.
Building the Right Soil Mix
The soil you fill a raised bed with is not the same as what you'd dig out of the ground. Native topsoil alone tends to compact over time in a contained bed, impeding drainage and root growth. A purpose-blended mix performs significantly better.
A widely referenced starting formula - popularized in intensive gardening circles - combines roughly equal parts of topsoil or compost, a coarse amendment like perlite or coarse sand, and additional finished compost. The exact ratio can vary, but the goal is consistent: a mix that retains moisture without becoming waterlogged, drains without drying out instantly, and provides immediate biological activity to feed plant roots.
For food gardens, compost is the backbone of long-term productivity. If you're generating your own, see our guide to composting at home for advice on producing rich, finished material from kitchen and yard scraps. Purchased compost works too - look for products that list specific ingredients rather than vague descriptions.
Avoid filling a raised bed entirely with bagged potting mix intended for containers. These products are formulated for pots and often lack the density and biological life that a garden bed benefits from.
Maintaining Your Raised Bed Season to Season
Once your bed is in the ground and planted, ongoing care focuses on replenishment and monitoring. Because raised beds are productive and well-drained, they deplete nutrients faster than in-ground plots. Topping off with an inch or two of finished compost at the start of each season - spring and fall - rebuilds organic matter and restores biological activity without needing synthetic inputs.
Mulching the surface between plants conserves moisture, regulates temperature, and suppresses weed seeds that blow in from outside the bed. Our guide to mulching garden beds covers depth and placement in detail. Two to three inches of shredded leaves or straw works well for most raised beds.
Watch for the frame itself. Wood will eventually weather and soften, especially at corners and near the soil line. Inspect annually and address loose joints or soft spots before they become structural failures. Metal beds should be checked for surface corrosion at fasteners or cut edges.
If you're planning your first edible garden and want a broader framework for what to plant and when, our guide to starting a vegetable garden from scratch walks through site selection, spacing, and first harvests in practical detail. A raised bed is often the ideal starting point for that journey.
Don't Skip the Drainage Check
Building a raised bed over a low-lying area that already collects standing water can lead to chronically saturated soil, even with a well-draining mix. Before building, observe where water pools after a heavy rain and choose a site that sheds water naturally. If your only viable spot has drainage issues, extending the bed's height or adding a gravel layer beneath can help.
The content on this site is for informational purposes only and is not a substitute for professional advice. Always consult a qualified professional for guidance specific to your situation.